So, you’ve gone out and bought or borrowed an Elden Ring and now you’re stumped. The large open world of Elden Ring is a beautiful and dangerous land to see, but now that you’re in the land of the tarnished, a little guidance may be useful. In this Elden Ring guide series, I’m going to take you through the base game. I will likely mention side quest locations as we near them. Maybe bring up the location of a secret item that could be useful along the way, but this will be a pretty straightforward guide to help you along the way in case you get lost.
You have likely already begun the game, so I’m just going to recap the starting area of the game and explain our way to and through Stormveil Castle.
You’re going to be thrown into a boss fight right off the bat. Don’t sweat it at all. This boss is meant to kill you from the get go. When you have completed the game and started New Game+, you’ll be able to get your revenge and easily whoop him the second time around.
Now our journey begins in the Stranded Graveyard. Making your way through is pretty straightforward and there are messages along the way that explain the basic controls of the game for you. You will see as you playthrough that the controls become more advanced and just how simple this area really is. Enjoy it while it lasts because it won’t be long until things begin to heat up.
 Now that you have made your way through most of the area, it’s time to face a mandatory mini boss. Soldier of Godrick is very easy to beat. You shouldn’t have much trouble defeating him, but keep in mind, he is probably the easiest fight in the game. After you finish the tutorial, the game picks up the pace and starts punishing you for underestimating your enemies. It’s not hard to get overwhelmed by baddies.
Now that you’re out of the cave, I would recommend exploring a little bit. It’s a huge open world and there are a lot of hidden secrets to be found. Now that we’ve gotten that out of the way, it’s time to make our way to Stormveil Castle. Start making your way East and enter the Storm Gate. If this is your first playthrough, just take your time and try not rush right into fights as there will be more soldiers around the area. You stealthily work around the area to take a headcount and try to lure some of them in one at a time. Or just rush right in there and see what happens. Totally up to you.
As you work your way, there are going to be some dangerous enemies ahead. Crossbowmen and a large troll are just waiting to ambush you. My first time through, the troll killed me. I ended up riding past the area on Torrent and avoided further deaths. Once you’ve moved on you’ll come up to a site of grace and meet a new NPC. Go ahead and do your thing.
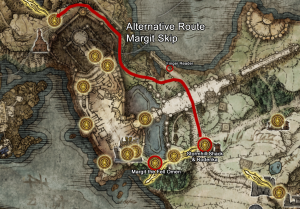 Moving along, you’re going to encounter some heavy artillery that can be difficult to get past. I’m talking about deadly batistas. Hop on Torrent and gallop to the left in the woods and along the castle walls to avoid getting damaged. Kill the soldier manning the ballista and handle the rest how you see fit. Enter the tunnel and find another site of grace. Take a rest and prepare yourself for a boss fight. If you explored before trekking straight here, I’m sure you found the merchant and the church and activated that site of grace. It might be wise to fast travel there and purchase anything you might find helpful for a big boss fight. You can also upgrade your weapons if you have the stones for them.
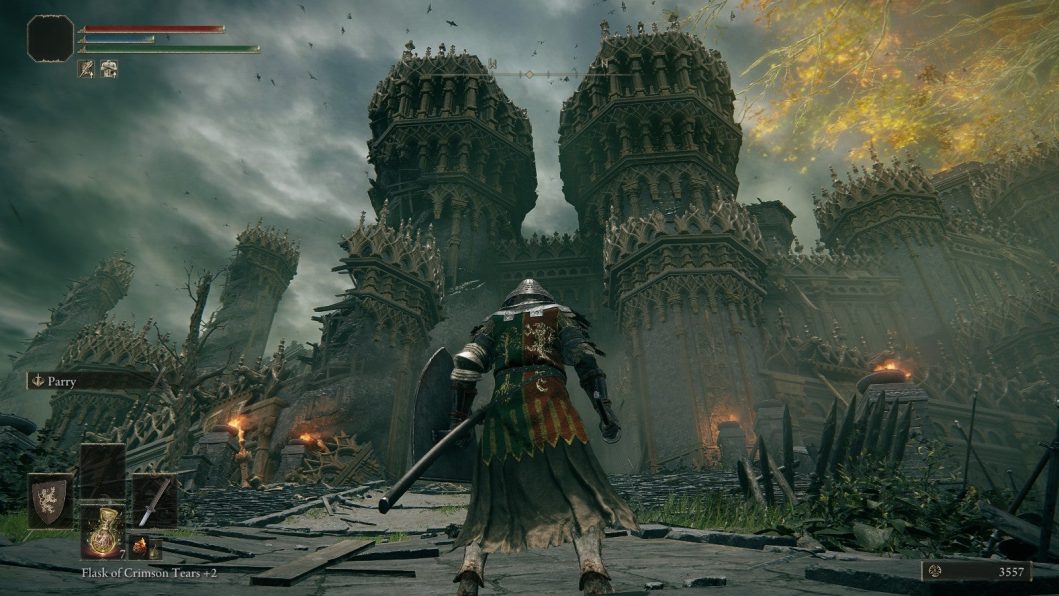
Now that you’ve prepared yourself, it’s time to travel back to the site of grace and face Margit the Fell Omen. I guess they refer to him as a mini boss, but Margit is nothing to scoff at. I found him to be a challenging boss and I am not afraid to admit that after he beat me a dozen times over, I summoned 2 other players to give me a hand. Even with 2 other Tarnished by my side, I had to fight him a few more times until I won. So, best of luck in this battle, my friend.
Once you have defeated Margit, you will be able to continue onto the castle. Get some rest, you’ve earned it.
This concludes my first entry in the Elden Ring Walkthrough guide. Next we’ll cover the castle area. Things are about to get interesting!